Our hosts this month, Barbara of Barbara Bakes and Bunnee of Anna+Food have chosen a delicious Stacked Green Chile & Grilled Chicken Enchilada recipe in celebration of Cinco de Mayo! The recipe, featuring a homemade enchilada sauce was found on www.finecooking.com and written by Robb Walsh.
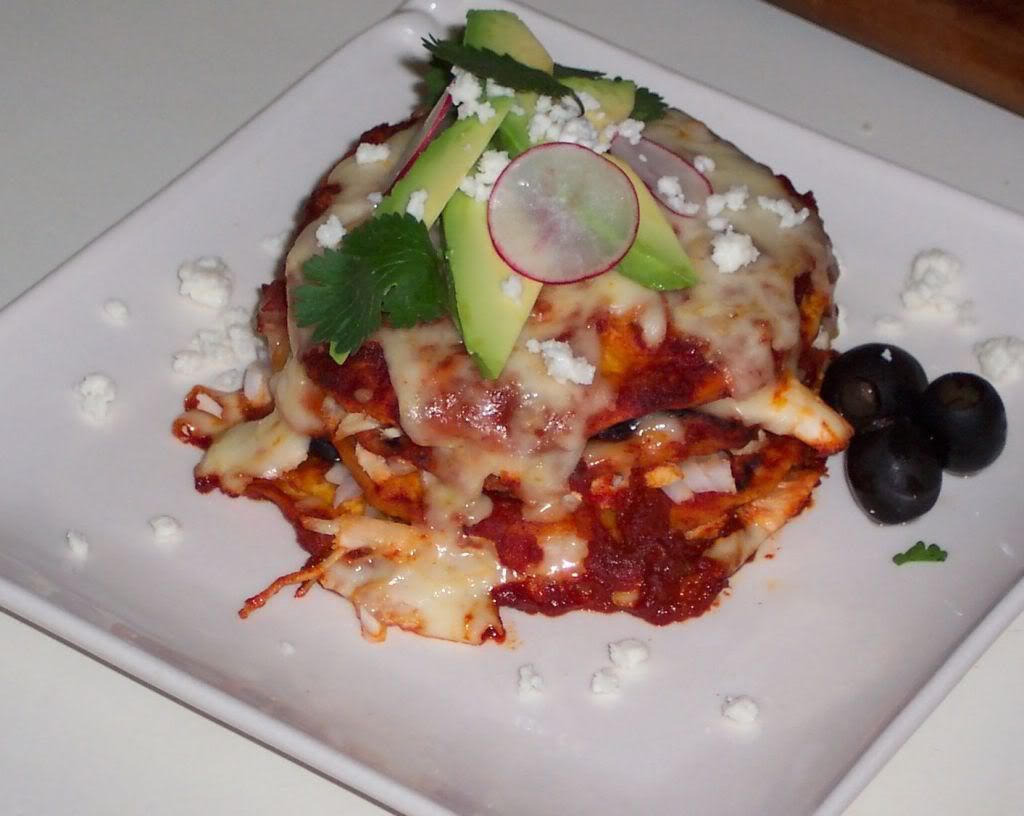
As you can see my Enchilada Stack is not green. Last month I worked on making some
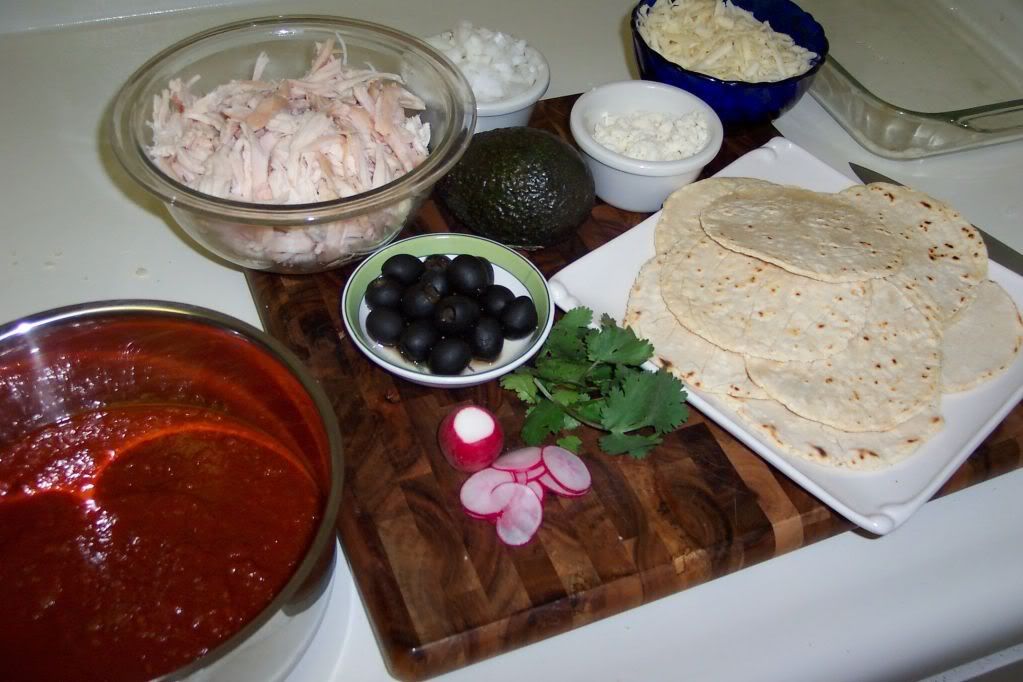
Chile Verde and felt that I would give making a red sauce a try instead. I made homemade corn tortillas and stacked the enchiladas with olives as an ode to my Mother's enchilada influence.
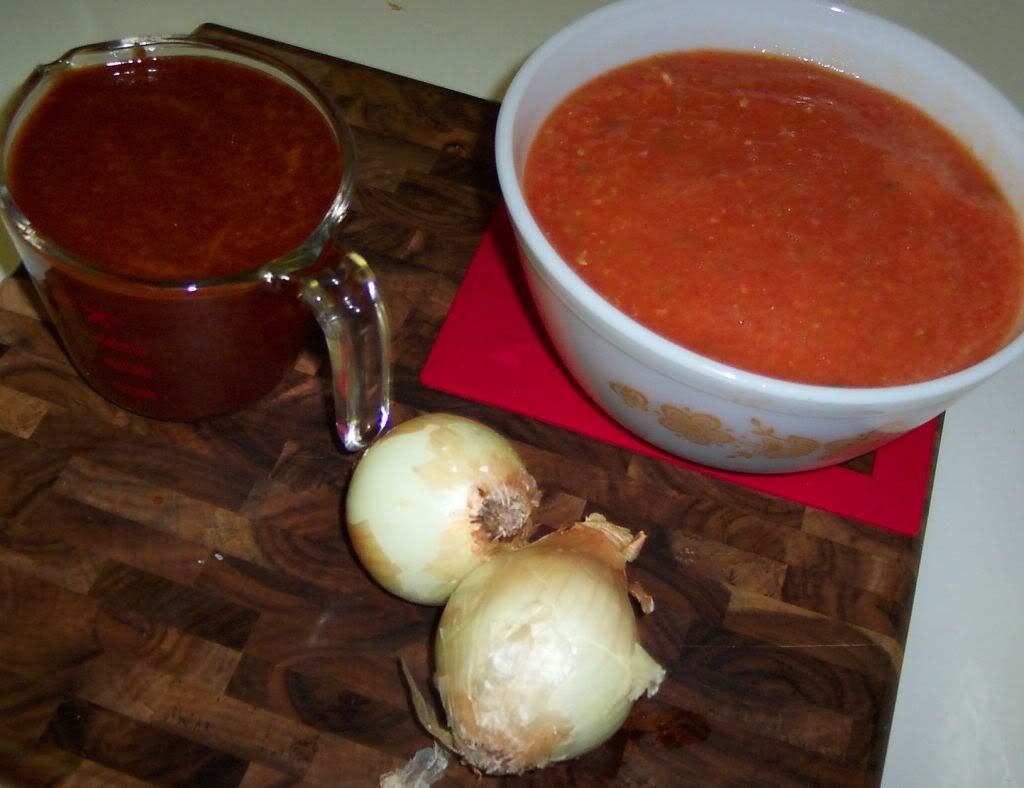
Please note that I made a large amount of enchilada sauce to freeze and use again on another day.
Enchilada Sauce:
- 3 Guajillo chiles, stemmed and seeded
- 3 Ancho chiles, stemmed and seeded
- 3 cups of hot water
- 1 large, or two small yellow onions, chopped
- 2 garlic cloves, chopped
- 1 Tbsp ground cumin
- ½ tsp ground oregano
- 1 Tbsp vegetable oil
- 2 ½ pounds fresh tomato
- 1-2 serrano chiles, halved and seeded
Corn Tortilla:
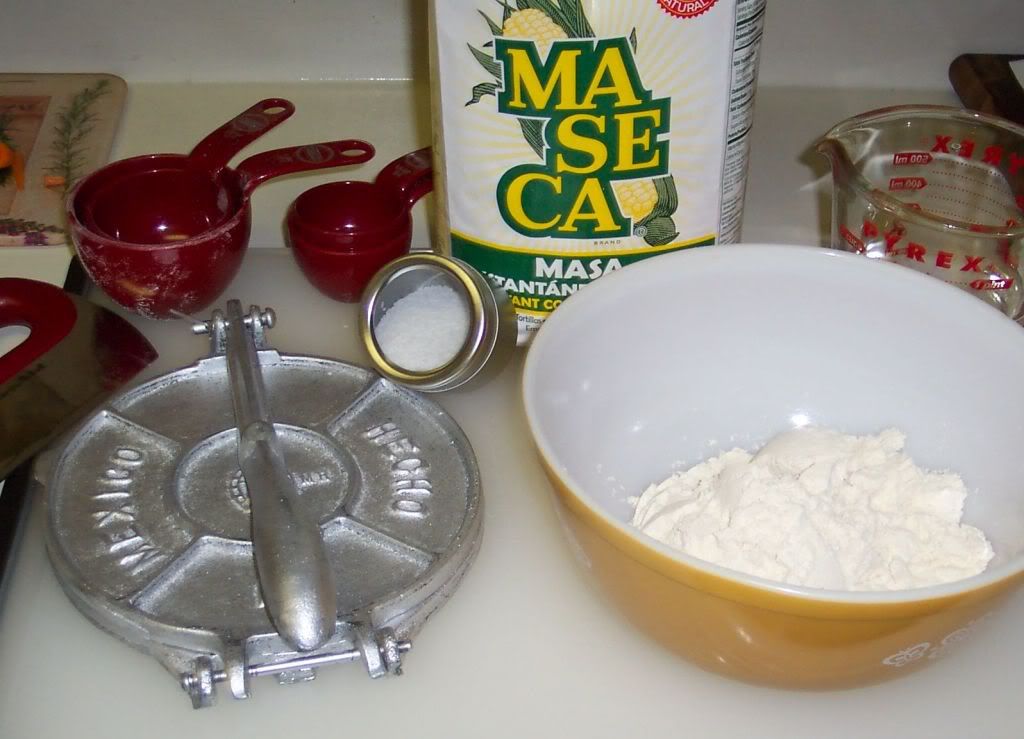
- 1 ½ cup masa flour
- 1 cup warm water
- ¼ tsp kosher salt
- tortilla press
Enchilada Stack:
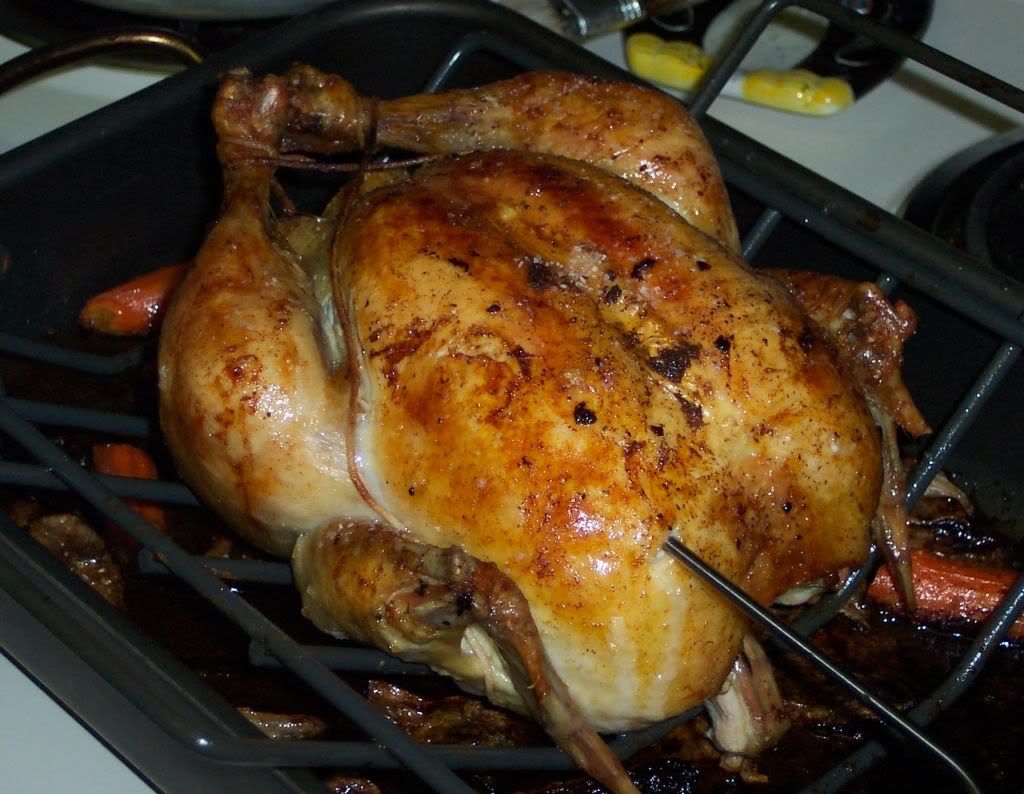
- Roasted chicken meat, shredded (white, dark, or both)
- white onion, chopped
- jack cheese, grated
- black olives, chopped for the inside, some whole for the garnish
- Queso fresco cheese, garnish
- cilantro leaves, garnish
- radishes, thinly sliced, garnish
- avocado, sliced, garnish
Enchilada Sauce Method:
Preheat oven to 400 degrees
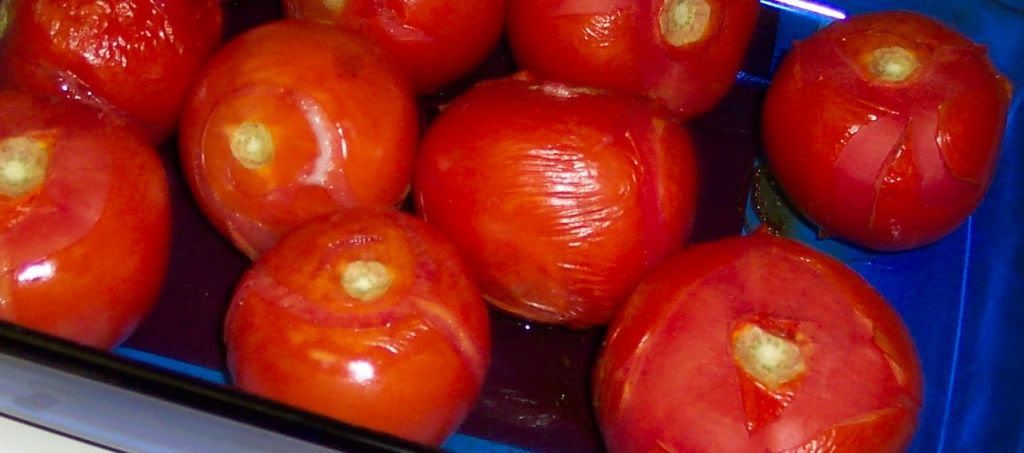
Place clean tomatoes in a large glass heat proof dish. Roast the tomatoes for 45 minutes to an hour, turning once. The skin should start to shrivel up and fall off.
After the tomatoes have cooled down remove the skin and discard.
Add the garlic and serrano chiles to the blender and then put the peeled tomatoes on top along with the cumin and oregano. Puree for about 20 seconds, you don't want to bust up the tomato seeds themselves because then the sauce will become bitter. Pour the sauce into a glass bowl and set aside. I try to always use nonreactive cook items when cooking with tomatoes.
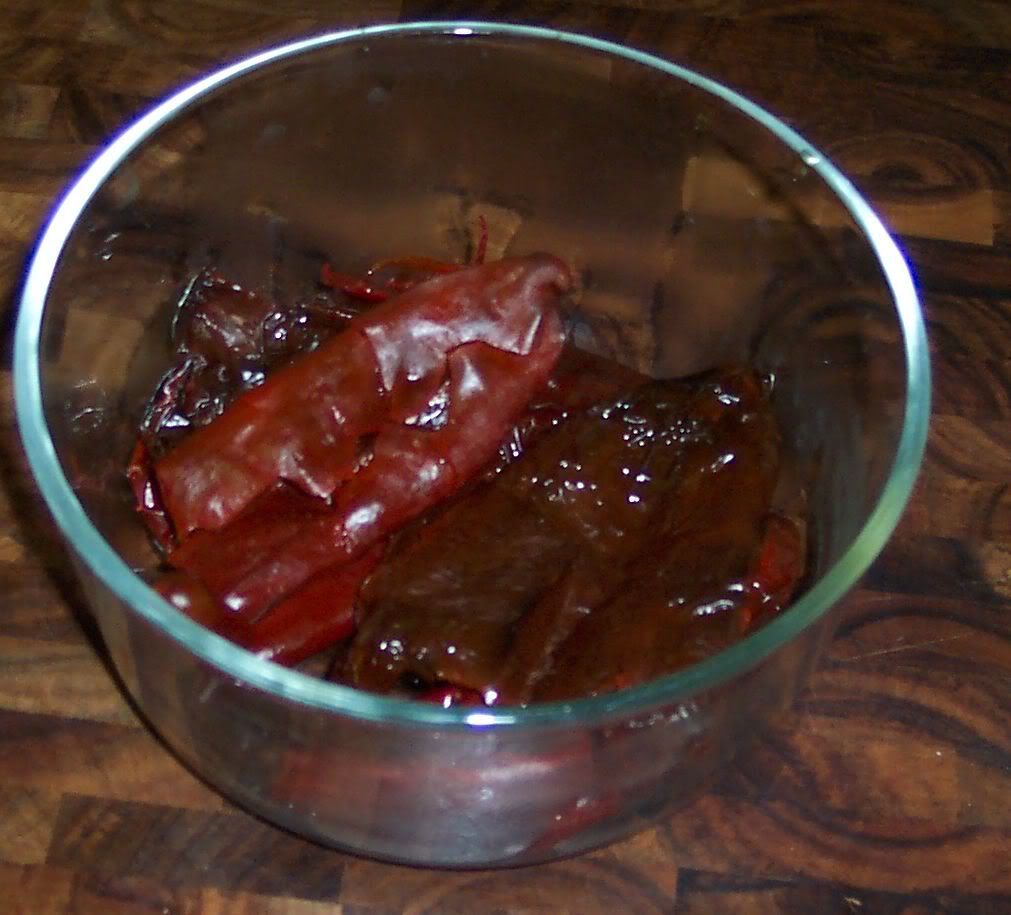
Place the stemmed, and seeded Guajillo and Ancho chiles in a small sauce pan. Cover them with water and bring the water to a boil. Once the water boils turn the water off and let the chiles steep till them are plump and hydrated.
Remove the chiles from the water and place them in a blender. Taste the water the chiles stewed in if it tastes bitter discard. If it does not taste bitter add one cup chile water plus one cup tap water to the blender. Puree the chiles till the are completely blended. Run the chile sauce through a fine mesh strainer.
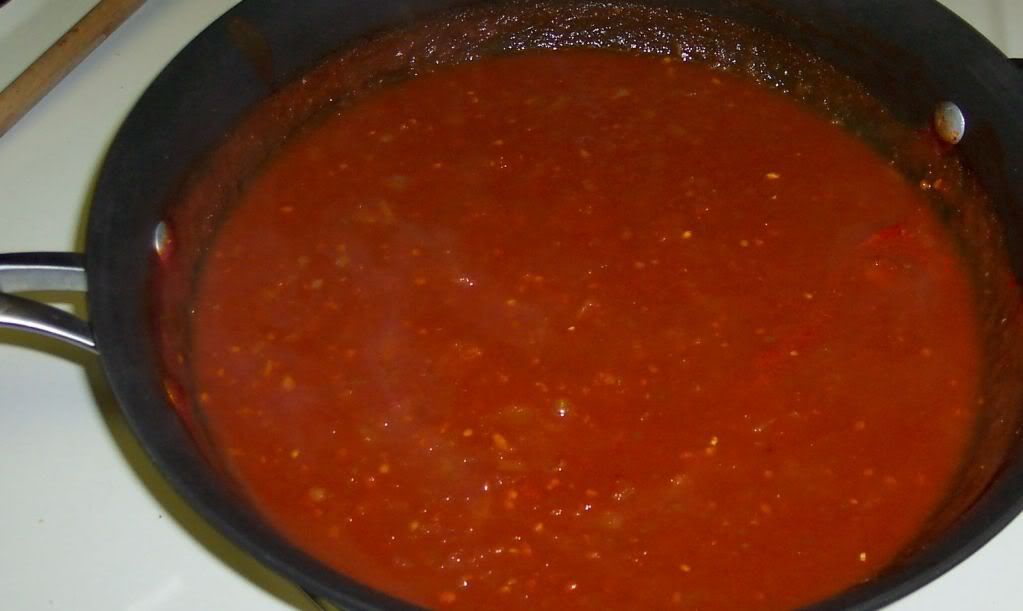
Heat a large sauce pan over medium heat and saute the onions in vegetable oil till they are translucent. Add the pureed tomato and chili mixture. Simmer for about 20 minutes. Taste for flavor. You might need to add salt or even sugar to the sauce depending on the ripeness of your tomatoes.
Corn Tortilla Method:
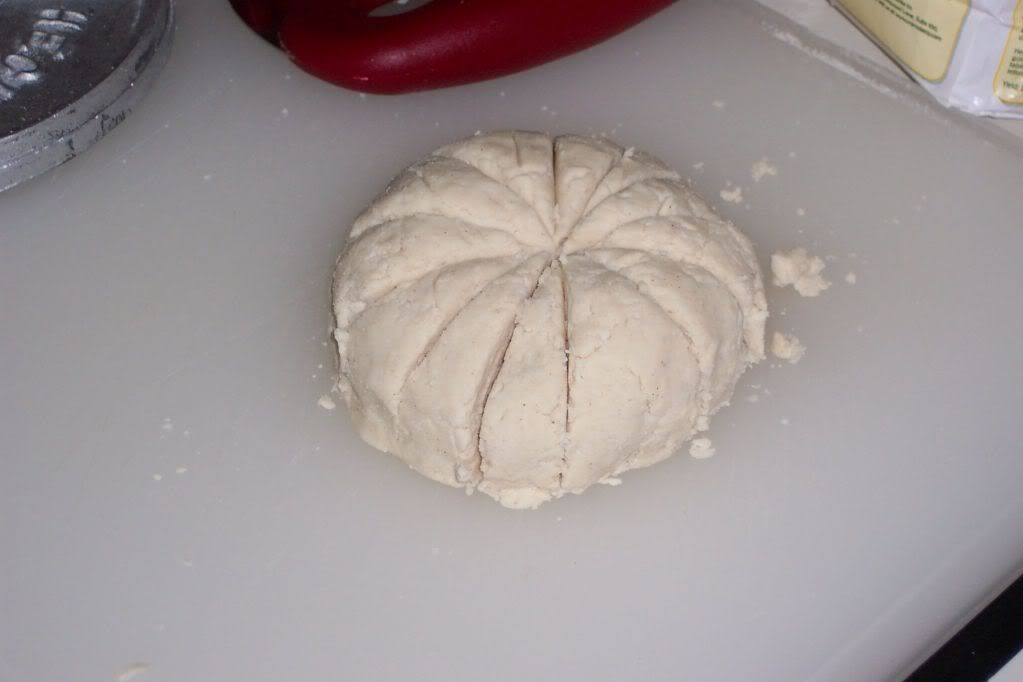
Mix mesa with salt, and cover it with warm water. Stir it till it is loosely combined and then cover it for 20 minutes. Come back and form it into a large ball, you may need to add more water to help it come together; add 1 Tbsp at a time. Section the dough into 12 triangles.
As you can see mine are not all the same size. Whoopsie!
Roll them into little balls and press them out in the tortilla press.
Store them between sheets of parchment paper before and after you cook them. Heat a large skillet, preferably cast iron over medium high heat. Cook each tortilla for about 30-40 seconds a side. Serve them right away or store them in a plastic bag in the refrigerator.
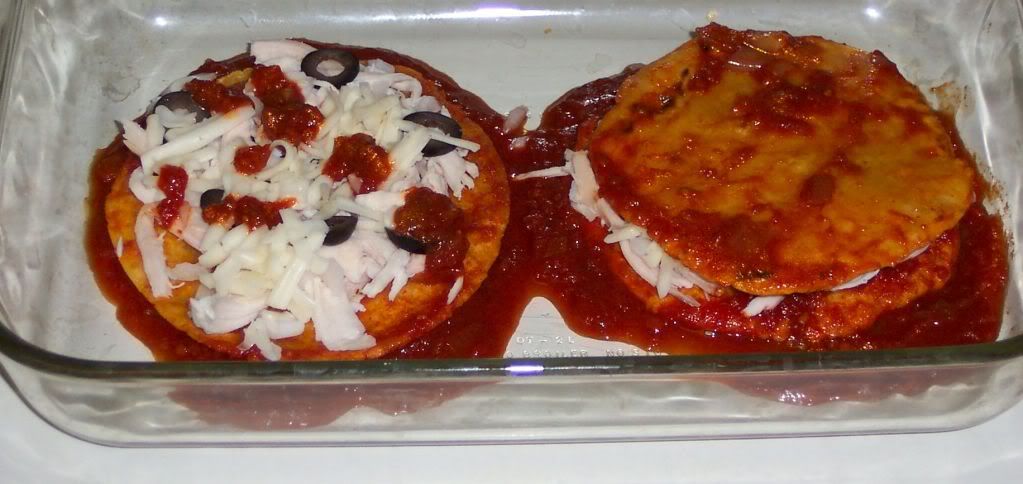
Tortilla Stack Method:
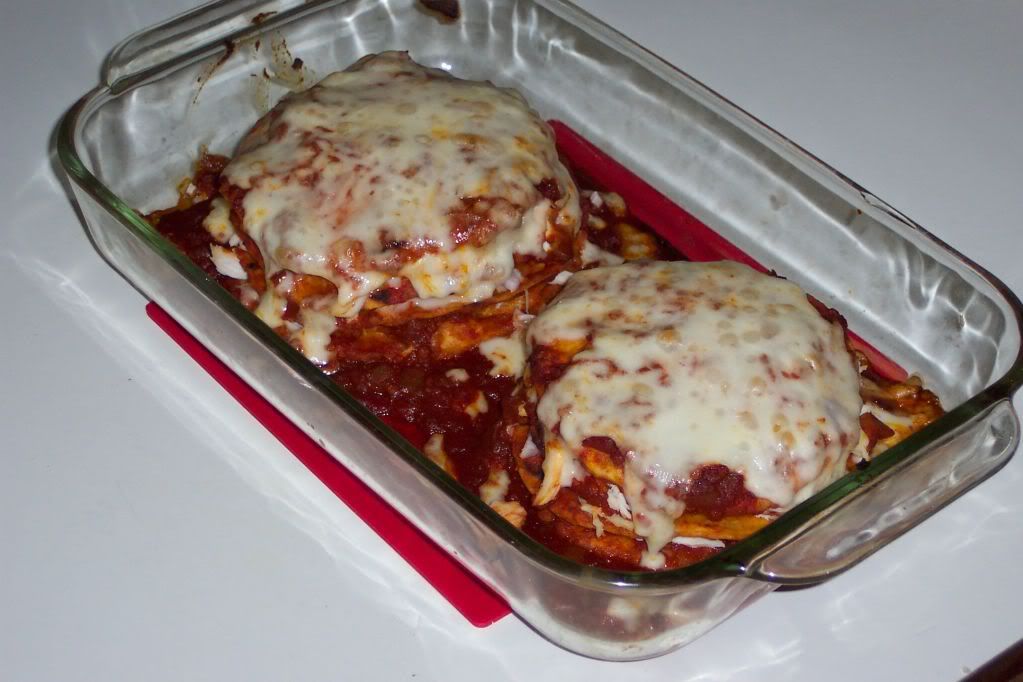
Basically I heated a small amount of peanut oil in a skillet. Toasted each tortilla and then dipped it into the heated enchilada sauce. I stacked mine with layers of chicken, white onion, jack cheese, and sliced olives. I baked them for about 20 minutes at 350 just till the cheese started melted. I plated them and garnished with whole olives, fresh avocado slices, sliced radishes, cilantro, and Queso fresco cheese.
Great challenge, and a great way to spend Cinco de Mayo